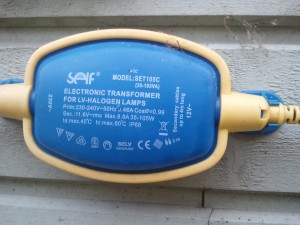
Our kids have two pet rabbits, which live in their own pethouse. To keep the house nicely warm and dry during winter I have installed a heater in it. Although the heater was originally designed for doghouses, but works very well here too. It has a simple plywood plate which contains an embedded resistor that provides about 40 W of heating power. System is powered with waterproof IP68 power supply which outputs 12 AC.

When the winter came again and I turned the heater on I soon got an alarm from my Blitzortung station that it no longer sends signals. When I looked at the station I found out that it was in interference mode, which means that system has detected some kind of electromagnetic noise near it. I didn’t first understand that it was the rabbithouse heater that generated the noise.
Once I started investigating the problem I first connected my fluke voltage meter to heater 12 AC line. There was some voltage, no problem, but the meter showed that frequency was about 27 kHz! I had to connect my old oscilloscope to system to find out what really was happening. It revealed that output really had a strong high-frequency content. I figured out that it must be some kind of filtering capacitor that had blown in the power supply, but actually the power supply was really designed like that. I think the reason for this design must be that most components after switching power supply transformer can be omitted, making it cheaper. Note that I might be wrong, maybe there is something actually broken in power supply (I don’t have a new similar one available for comparing).
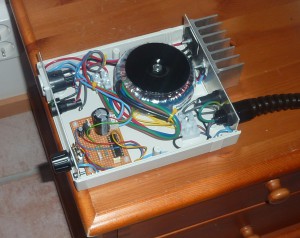
As this was already second power in the history of this heater I started planning a better power supply of my own. As the Blizortung station is near the heater switch-mode designs could not be used so I ended up using a traditional toroidial transformer.
But the heater had another problem I was tempted to solve at same time. As the rabbithouse is quite well insulated the heater provides too much power when the temperature is near zero or over it. With the original power I used to solve this by timer clock, which turned the heater on for 15 minutes and off for another 15 minutes, resulting in 50% of power.
A rectifier after transformer, with filtering capacitor and adjustable voltage regulator would of course be the traditional solution. But as the heater will be used with partial power quite a lot this kind of system would provide a lot of heat in power supply. To avoid this, I desided to use a very slow PWM modulation. When using about 1 Hz frequency there won’t be much of any high-frequency noise emitted by system and a suitable MOSFET to do the on/off switching should keep heat produced by power at minimum.

What would be suitable design to control the PWM ? As I have been playing with Texas Instruments MSP430 Launchpad using a Value Line microcontroller chip like it has seemed like a good choice. I settled on MSP430G2533 as it costs only about 1.90€ on mouser.com and is available in PDIP20 package for easy hobbyist soldering.
When I measured the heater resistance, it was only about 1.2 Ohm. This seemed a little bit odd, as feeding it with 12 AC would provide about 120W of power, which is much more that it actually has delivered. But as the frequency of original power supply is so high, the heater is no longer a pure resistive load and the actual power is limited by it’s inductance. Because of this, I decided to order a 9V transformer instead of 12V one. If that would still be too much, I could always limit PWM duty cycle maximum to something less than 100%.
I ordered transformer, case, rectifier and other necessary stuff from electronics store. While waiting for those things to arrive, I wrote a simple program for microcontroller (which I had already available) to do the PWM and tested it on breadboard. After I got the other components it took only one evening to put everything together.
Everything seemed to work ok, except that I had to change to mosfet to another type. The IRF540N I first used didn’t work well with microcontroller 3.3V GPIO output pins, I somehow overlooked the fact that I needed a ‘logic level’ FET here. After changing the part to IRL2203N everything looked good.

During the test run I found out that the output voltage seems to drop below 9V during full load, so it might have been wise to choose a little bit more powerful transformer instead of the 80VA one. The system generated some heat from rectifier, mosfet and transformer, but the large heat sink takes care of that quite well. But just to be super-safe about not getting overheated, I added a few lines of code to microcontroller program which turn the power down to 10% if inside temperature rises above 45 °C.

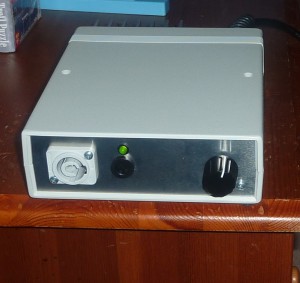
After testing I installed the power to actual pethouse heater. I drilled a hole through storage wall to be able to place the unit indoors, cut the old cable and attached a powercon connector to it. I turned the system on to about 50% duty cycle (this is visible from LED that blinks at 1 Hz rate according to heater power). After a few hours the temperature of heather was checked by placing hand on it in the pethouse and everything seemed to work fine, it felt a little warm just as it is supposed to be.
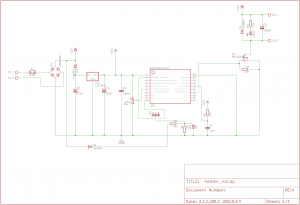
The schematic has components for zero-crossing detection, which is connected to digital input pin of MSP430. Pin is configured to generate interrupt when signal falls near to zero. This interrupt routine is then used to manage mosfet gate signal so power always turned on or off when there is not much power in circuit.
Source code is available at Github.


